15 December 2015

[Photography] Goodbye, Punggol Lonely Tree

The Punggol Lonely Tree will be removed tomorrow. It was a popular site for wedding photography. I only rode past and never took a picture before, until I read that the tree will be removed because of safety concern. More info about the tree here. Fun fact: it is probably the only tree in Singapore that has a  location tag in Google Maps.

So I went down to take the first and last photos of the tree.

Punggol Lone Tree, now condoned off from the public.


Sign from HDB (I wonder why is it not NParks?)  stating the removal of the tree.


Punggol Lone Tree.
As mentioned, the location of the tree in Punggol.
Another memory archived here.


~ZF

10 November 2015

[Photography] Birdwatching: Bidadari

Bidadari is a birdwatching wonderland. It was a cemetery, yet it retains much of its rustic charms. Read more about it here. Many bird-watches come here to see the flycatchers and other exotic birds.

Here are some pictures taken during two recent trips to the defunct cemetery.

Yellow-chested Jungle Flycatcher. Taken on 1 Nov 2015.

Ferruginous Flycatcher. 8 Nov 2015

Ferruginous Flycatcher. 8 Nov 2015
 Besides flycatchers, some rare kingfishers can be spotted too, like the Oriental Dwarf KF:

Oriental Dwarf Kingfisher. 8 Nov 2015.

Occasionally, there will be birds of prey visiting the area. Spotted a Changeable Hawk during my visit on 8 Nov.

Changeable Hawk. 8 Nov 2015.

The Changeable Hawk was bobbing its head, presumably checking out the distance between us. 

Hope not too much development will happen on this little piece of natural haven. I shall go there more often in case it disappears one day...

All photos taken with the Nikon D750 and Tamron 150-600mm.

~ZF

24 October 2015

[Photography] After Two Visits to Coney Island

Coney Island Park, also known as Pulau Serangoon, opened to the public on 10 October 2015.

Read here for the news.

Located in the north of Punggol, it is easily accessed by cycling via the waterways. Drivers can park at the Punggol Settlements (a F&B establishment) nearby and take a 10min stroll to the park.

The island is approximately 2.5km long, cycling may not pose a challenge. However, there are many flora and fauna to be appreciated. It also boasts a beach for families to enjoy. It is said to have over 80 species of birds, and a shy and mysterious lonely bull on the island.

The significance of the island is that it opens up another route to Lor Halus, one of my favourite bird-watching hangout, and hence to Pasir Ris. However, the park opens from 7am to 7pm daily because there's no lighting in the vicinity.

I visited the island twice so far - once cycling from my place in Punggol and once parking at the Punggol Settlement and took a walk in the island.

Here are some photos I have consolidated so far. All photos taken either with Fujifilm X-T1 or the Nikon D750.


The West Entrance (near Punggol Settlement).

The East Entrance (near Lor Halus)


A sign reads "Coney Island" along one of the beaches.

One of the beaches. There are five beaches, aptly named Beach A to Beach E. IMO the beaches are shallow, I mean the sand part. I do not know if it can accommodate people who would want to suntan or play games there.... 


Spotted this chap during my second trip. It was making alot of noise. A Oriental Magpie Robin.

I heard a group of parakeets got scared off and saw this Brahminy Kite landed on the tree. I managed to capture this after trying to get a good angle and eventually it flew away.

The Brahminy Kite.

 Here are some of the photographs I composed along the way.


This photography was inspired by the recent haze.

No, I did not see the bull.


Anyway, if you plan to visit the park, do take note of the following:

  • The opening hours (from 0700H to 1900H)
  • Bring water and hydrate yourself thoroughly.
  • Wear comfy shoes, preferably covered.
  • Wear long pants, because it is said there are much sandflies
  • Do not forget insect repellant too, although I doubt the effectiveness against sandflies. I am a mozzie magnet, but I was not bitten even once. (I got 20+ in Sungei Buloh Wetland Reserve)
  • There's only one toilet which is located near the East entrance. 
  • Abide to the rules visiting the park! That means, do not litter, do not disturb the wildlife which includes making lots of noise, etc
That's all I guess. 

~ZF


[Photography] It's A 10/10 Wedding!

Supported a friend's friend actual day wedding. It was a simple fare and nothing too lavish. The sweet couple registered for their marriage a few months back and chose 10 October to be their customary wedding day.

I am sharing some photos that I took that will not undermine their privacy.


Apparently, most of my photographs have faces of them..

Regardless, I enjoy taking photographs of weddings, the bride preparing, the anxious looks on the parents (especially the mother), the gate crashing and the tea ceremony.

In addition, I am very happy with the performance of the D750 and the somewhat-vintage 35-70mm lens (the grandfather of the popular 24-70mm) that I used on that day. It may not be as wide as its descendants, but it gets the work done.

~yZhifa

21 June 2015

[Photrography] Birdwatching: Pin-tail Wydahs Courting

Recently learnt that there is a new birding wonderland - Punggol Barat.

Being curious, I went to take a look. It was not difficult to find, but it was not really accessible. Nevertheless, I was surprised to find many people there.

Anyway the Pin-tailed Whydah is a gorgeous birds. Some pictures to share.


Taken on 14 June 2015.

Taken on 20 June 2015.

Taken on 20 June 2015.

The male will hover around the female like this during courtship.

I like grassland birds. They are small and cute, but they are fast and elusive, making it very difficult to photograph them. There are many other grassland birds in the area, and I will share time soon!

~ZF

22 March 2015

[PSA} Loot from the IT Show 2015 - Epson L355

The IT show, that start on Thursday, 19 March 2015, at the Suntec City, just ended. I visited the show on Friday.

My objective was to buy a printer. After much research I decided to buy the Epson L355.

The Epson L355 uses the Ink Tank System


Why?

Firstly, this printer uses the Ink Tank System (there will be a picture to show) instead of using cartridges. There are four tanks for four different colours - Black, Cyan, Yellow and Magenta. These tanks are filled by the respective ink bottles, which came together with the printer with two additional black bottles (in summary, there are three black, one cyan, one yellow, one magenta bottles altogether). Because of this Ink Tank System, the printing cost for this printer is greatly reduced. A new ink bottle cost SGD$9.90, as oppose to a cartridge that can well be in the $30 range, or more.

Secondly, it has WIFI. I thought this function is neat, so I can print documents or photos from devices that are connected to my home WIFI network. This also do away with the need to have cables running around the room and additional switches to allow other computers to print using the same printer.

Ink tanks of the Epson L355.


First Impression

The printer is compact, and that is ideal as I have a small niche that I could place it to optimise space.

Filling up the tanks is easy, but require some nimbleness. I stained my fingers in the process, but I guess it could be avoided if I were more patient. The printer needs to be charged up, which takes about 20min, before you can set up the printer.

Set up is easy. However, to set up the computer to link through the WIFI network requires the printer to be connected physically via the USB cable connected. Not a problem if you use a laptop but it might be tricky on a desktop. Nevertheless, setting up is a breeze once you get over with the physical connection.

After setting up, I loaded some paper and decided to do some wireless printing!

Initially, I have some difficulty to print from my Android device. Then I realised that I need to download a plugin and enable under Settings > Printing. This enable me to do cloud printing.

Impression After First 5 Minutes of Use

It was somewhat a gamble to buy this printer, because I encountered many not-so-nice reviews. The printer was not really consider cheap (I shall come to this later), although the long term operation cost can be, but I was certain that there must be some compromise on the quality. My other concern was the reliability of the WIFI connection.

However, after the initial usage, my concerns were really unfounded.

The connection is reliable. My router is stashed away about 10m away from the printer in a cabinet, with at least 2 walls in between, yet the connection to the printer is still strong.

The quality is good. I printed a picture on my android device in DRAFT mode, and I thought the quality is decent.v Printing speed is fast too.

Picture printed using the Epson L355 through WIFI, in draft mode on 70gsm paper.

I also bought a pack of photo-paper to try printing photographs. The quality is awesome too. However I read that the colours will fade after two months. I shall monitor and give an update on this. The photo-paper I bought was the Epson Photo Paper (Glossy) - cost SGD$6.20 for a packet of 20 from Challenger.
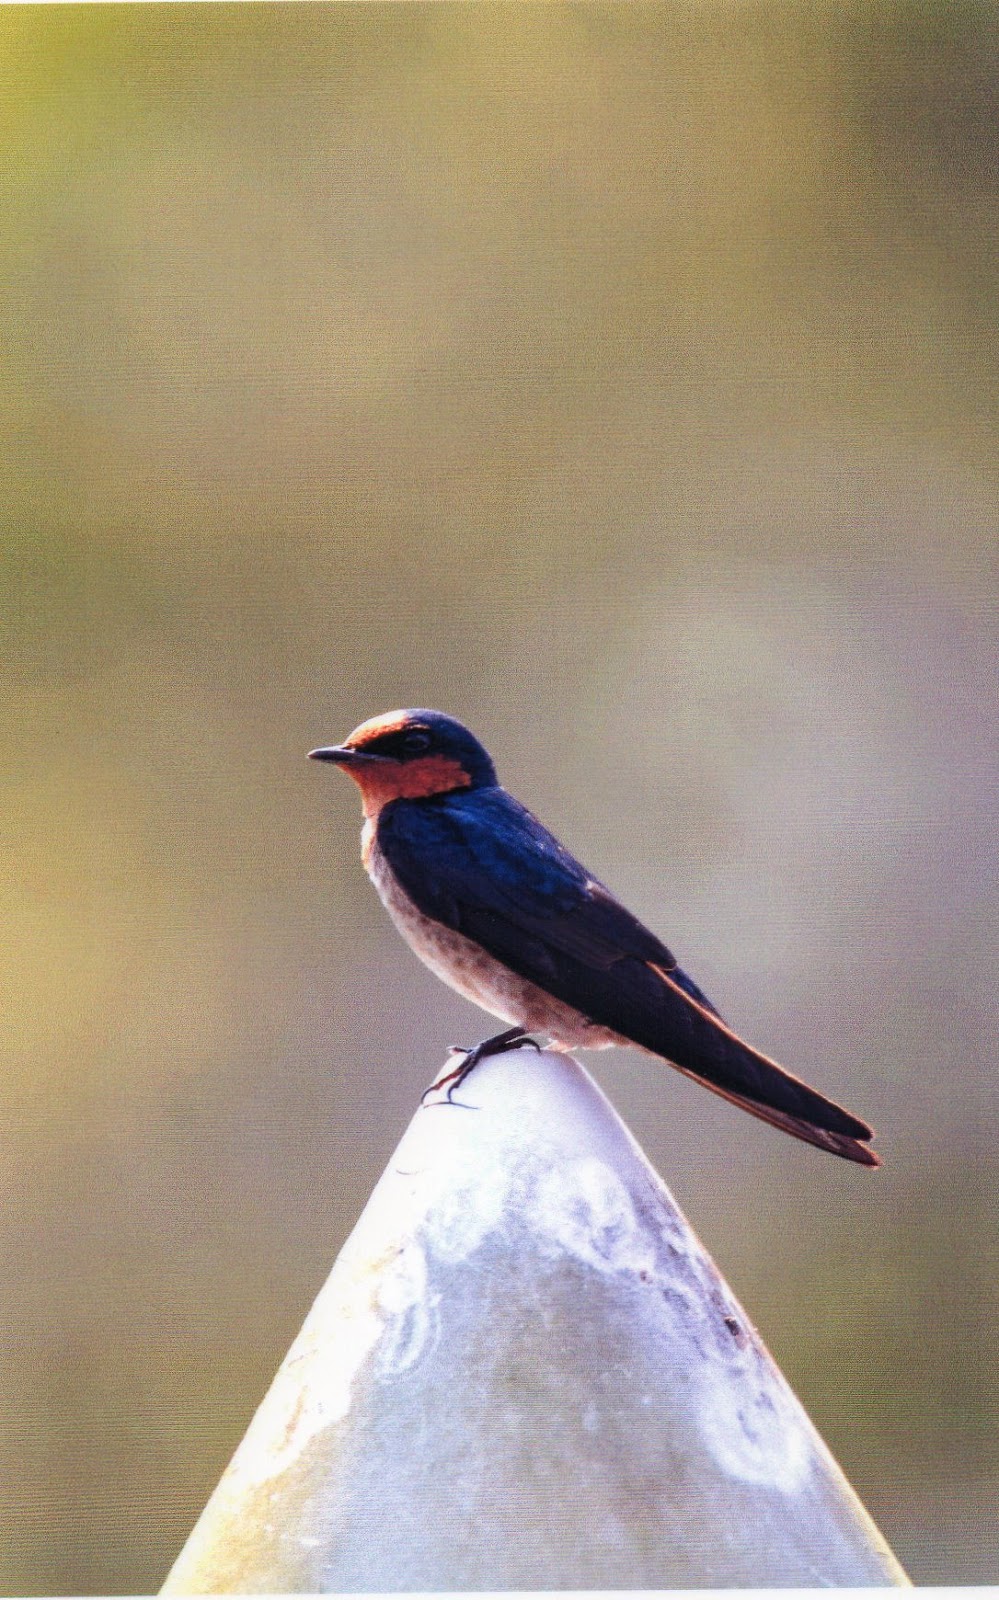
Scanned sample photograph printed by the Epson L355 on Epson photo-paper (glossy). Scanned by the printer too, using the Epson Scan application in Full Auto mode.

The original picture - the Pacific Swallow. Well, might not be a good representation because of the loss due to compression and all.


Costs

Here's the important part - the cost of the printer. The printer cost about $299 and there are 6 bottles bundled with it, which amounts to about $60. A normal inkjet printer would cost half as much, but each ink cartridge would have cost at least 3 times more.

Each bottle fills up a tank, How long it will last I do not know yet. But I am sure, it should be about the same as an ink cartridge, if not longer.

Just for comparison, to replace every tank of the Epson L355 would cost $40. So the cost of the printer PLUS the cost of replacing ALL the tanks is $339 ($299 + $40), whereas a conventional inkjet with the same number of colours would cost about $275. While this number seems smaller initially, it will start to catch up after the second full change - $379 for the Epson VS $415 for the conventional inkjet.

And I have not really discuss the frequency of the ink replacement, which I think is dependent on how long each bottle/cartridge can last if the printing demand is kept the same.


Summary

If you are going to print a lot of stuffs, especially in black and white, such as worksheets (for your children to work on) and reference material, this printer is for you. The photograph print is decent if you are not very particular about the quality. To me, as a photography enthusiast, I think it is good enough.

What's more, this printer is greener in my opinion.


You can find out more about the printer in the Epson (Singapore) website.

~ZF

07 March 2015

[Photography] Birds Stand-off at the Pasir Ris Park

After a brief hiatus, I am back to bird-watching. Today I went to Pasir Ris Park.

I explored this park a few times before and did not cover the whole park. This park was huge, and because of this, there could be many types of birds to be spotted, which was very much dependent on the location. There was an area for fantails, an area for kingfishers, etc. There were some long canal with mangroves that were ideal for birds to perch and hunt.

Here are some pictures I took this morning.


When I reached the park, I saw this. This area is very popular amongst the birders. I followed a group and spotted a barbet before. 

So I looked up...

It's a pretty rare sight. A Crested Goshawk and a Spotted Wood Owl in a "stand-off". The owl is a resident in the park, so everyone was actually got excited by the hawk, which is nationally critically endangered. Some saw the hawk was consulting  the wise.
A closer look at the Crested Goshawk.

Another shot of the Crested Goshawk. The feather behind the head is kinda cute.


A closer look of the Spotted Wood Owl.


Another shot, more elegant perhaps, of the Spotted Wood Owl. Look at the talons!

So... apparently, the hawk was eyeing on one of the owlets perching on the same tree. But with the parent keep watch, the smaller hawk dared not advance, but everyone, including myself, was anticipating something. It was very much like NatGeo! In the end, the hawk just flew away.


One of the two owlets. The other was higher up. Cute eh?

This was not the only interesting sight I encountered. I also spotted the Banded Bay Cuckoo for the first time!

At first, I thought it was a Tiger Shrike, but the bird was too big to be a shrike.

The same cuckoo, with a prey in its mouth. It was fast, and caught that fly in am instant.

Also I got trolled (well, somewhat) by this Collared Kingfisher...


The Collared Kingfisher perching. In retrospect, this is one of the closest shot I've got. Normally, they would have flew away when I tried to walk closer.

This is where the troll began...

The bird started to prone down, and I anticipated it to strike at some insect it saw, but in the end it did not...


All in all, it was a fruitful trip. I was glad I made the trip to Pasir Ris Park, especially after the recent spate of dead farm fish in the eastern region.

For higher resolution of all the photos, visit the following links:
https://www.flickr.com/photos/cheehuat/
http://yzhifa.smugmug.com/

~ZF

01 March 2015

[Photography] Photowalk at the Gardens By the Bay Conservatories (with the Fujifilm X-T1)

Recently I went to the Gardens by the Bay Conservatories (the Flower Dome and Cloud Forest) and I brought the Fujifilm X-T1 I acquired recently for familiarization. The lens used was the XF 27mm f/2.8.

The Flower Dome is essentially a huge greenhouse that houses many exotic plants from various regions. Periodically they will have themed exhibitions, such as tulips from The Netherlands.Since it was the Chinese New Period, there are various festive plants being exhibited too.

Cloud Forest features a 4-storey high man-made waterfall (the highest I believe is still in Jurong Bird Park). It is actually an education centre.

By the way, both structures are engineering feats. You can google about them or check this link out.

I should let the photos do the talking... there'll be many photos of flowers that I cannot identify, but what other subject is better than flowers to do a camera familiarisation? (I know it's my wife, who was with me, but I am not going to post the pictures here).


Inside the Flower Dome. I liked the texture that the glass panes created very much. 

Dahlia and gold ingots on display.

Just trying to capture the water droplets on this plant.

There are many wooden sculptures such as the eagle here. Here i am trying to compose with the glass panes.

Flowers! More to come... but appreciate the colours created by Fujifilm...

More dahlias... this is probably the only type of flower I know.. I did not take much notice of the name plates that were on display, my bad...

Just appreciate the beauty of the flower.. and the colour produced by the camera...

More flowers!

Another Dahlia.

Hibiscus blooming.

More Dahlia.

Flower.

Cherry Blossom. One of the highlights of the exhibition.

I also like to take leaves that are illuminated by the Sun.

Introducing some bokeh here. Oh! the colour~~

More flowers.

OK. this dahlia would worth at least three lines of caption. I took sometime to take this flower because 1) it is white and 2) the light was harsh outside. After a few adjustments to the exposure, I finally managed to get the details of the flower and background out without overexposing the flower.

More flowers! And Bokeh!

Flowers!

The next set features the photographs I took in the Cloud Forest.

Taken under the waterfall because I saw disperse sunlight. I am a nut for this kind of dispersed light.

This was an interesting exhibit, a Rafflesia made of Lego! There were other plants that were made of the toy brick on display too!

This M-shape arch is the Cloud Walk. I was intimidated by it and concluded that I was afraid of heights.

I am pleased with the colours produced by the Fujifilm X-T1. The camera is easy to use too. Oh, by the way, I used the Chrome Film Simulation for the photographs. Fujifilm has the best film simulation algorithm. Just to show the difference, I present two similar pictures, one with Velvia Film Simulation (right) and the other Chrome Film Simulation. The Velvia of course produces more vibrant pictures, the chrome is rustic.


The Fujifilm X-T1 is a camera to love, but it is not perfect. The only complain I have with it is that the battery life is miserable. 1 full charge can take about 240-300 photos. So, apparently the battery grip is somewhat mandatory if I do not wish to change batteries during photoshoot. Hmm...

I guess the EVF is energy consuming, I do have some suggestion to conserve batteries:
  1. Use the power management function in the menu (duh).
  2. Use only the Eye Mode or the LCD mode, but the Eye Sensor. This makes the camera process less. Processing = consume battery.
  3. Avoid half-pressing for too long, or half-pressing for no apparent reason.
Guess this is all...

Happy photographing,

~ZF